kottke.org posts about Kenji Lopez-Alt
Like many of you, I’ve been wondering about COVID-19 & food safety. Is it safe to eat takeout prepared by your local restaurant? To answer that and many other questions, Kenji Lopez-Alt has compiled a comprehensive guide to food safety and coronavirus for Serious Eats. Kenji is the most fastidious and exacting food person I know — how could you think otherwise after having read The Food Lab? — so I take his thoughts and research on this very seriously.
Even so, plenty of folks — myself included — have been confused or curious about the safety of allowing restaurants to continue preparing and serving food. Is it actually safe? Should I reheat the food when I get it home? Is it better to support local businesses by ordering food, or am I only putting workers and delivery people at risk? And if I’m cooking my own food, what guidelines should I follow?
To answer these questions, I referenced dozens of articles and scientific reports and enlisted the help of Ben Chapman, a food safety specialist from the North Carolina State University and cohost of Risky or Not and Food Safety Talk.
Let’s get right to the nitty gritty:
Q: Can I get COVID-19 from touching or eating contaminated food?
According to multiple health and safety organizations worldwide, including the CDC, the USDA, and the European Food Safety Authority, there is currently no evidence that COVID-19 has spread through food or food packaging. Previous coronavirus epidemics likewise showed no evidence of having been spread through food or packaging.
Be sure to read on for answers to questions like “Are we going to run out of food?” and “Am I more likely to get COVID-19 from take-out, delivery, or cooking at home?”
The FDA has a coronavirus safety page on their website as well.
Unlike foodborne gastrointestinal (GI) viruses like norovirus and hepatitis A that often make people ill through contaminated food, SARS-CoV-2, which causes COVID-19, is a virus that causes respiratory illness. Foodborne exposure to this virus is not known to be a route of transmission.
In a piece from March 14, Amanda Mull talked with epidemiologist Stephen Morse from Columbia University about food safety:
Even if the person preparing it is sick, he told me via email, “cooked foods are unlikely to be a concern unless they get contaminated after cooking.” He granted that “a salad, if someone sneezes on it, might possibly be some risk,” but as long as the food is handled properly, he said, “there should be very little risk.”
And Don Schaffner, a professor in the food science department at Rutgers, has been posting information on food safety & COVID-19 on Twitter.
Even if a sick worker sneezed on my food (I know that’s gross), my risk of contracting COVID-19 from it are very low.
First it’s important to realize that this is a respiratory illness as far as we know. The biggest risk is being around sick people who are shedding the virus when they sneeze or cough.
Even if the virus did get onto food, we’re going to put that food in our mouth and swallow it so the virus will end up in our stomach. Our stomachs have a low pH which would likely in activate the virus.
After tinkering in the kitchen for weeks, Kenji Lopez-Alt has discovered a super-simple recipe for macaroni & cheese that uses only three ingredients and takes about ten minutes to make.
The idea for this came from working on my recipe for cacio e pepe, the Roman pasta and cheese dish. In that recipe, I cook spaghetti in a small volume of water, using the starchy pasta water to emulsify the cheese into a creamy sauce. I wondered if the same thing would work for an American-style macaroni and cheese, using a much higher ratio of cheese to pasta and using cheddar in place of pecorino.
It didn’t quite work the first time — the high proportion of cheese caused the sauce to break and turn greasy — but with a few tweaks, I nailed it.
Need to try this soon.
On Serious Eats, Kenji Lopez-Alt tests out different recipes using slow cookers, Dutch ovens, and pressure cookers and comes to the conclusion that the pressure cooker and Dutch Oven often give better results.
A good traditional chicken stock is made by simmering chicken carcasses and aromatics in water on the stovetop for several hours. A couple of years ago, I ran a few quick tests to determine whether or not stock could successfully be made in a pressure cooker or a slow cooker. From my own experience, I was fairly certain that the pressure cooker would produce a superior stock, while the slow cooker would produce a thinner, less flavorful one, but I was surprised by the degree to which this was true. The difference between the stock made in a Dutch oven or pressure cooker and the stock made in a slow cooker was like night and day. This experiment was a good start, but I decided that to really get to the bottom of this, a lot more serious testing was in order.
Neven Mrgan has been preaching the gospel of the pressure cooker for making risotto on what is probably my current favorite Instagram account, Sardine Brunch.
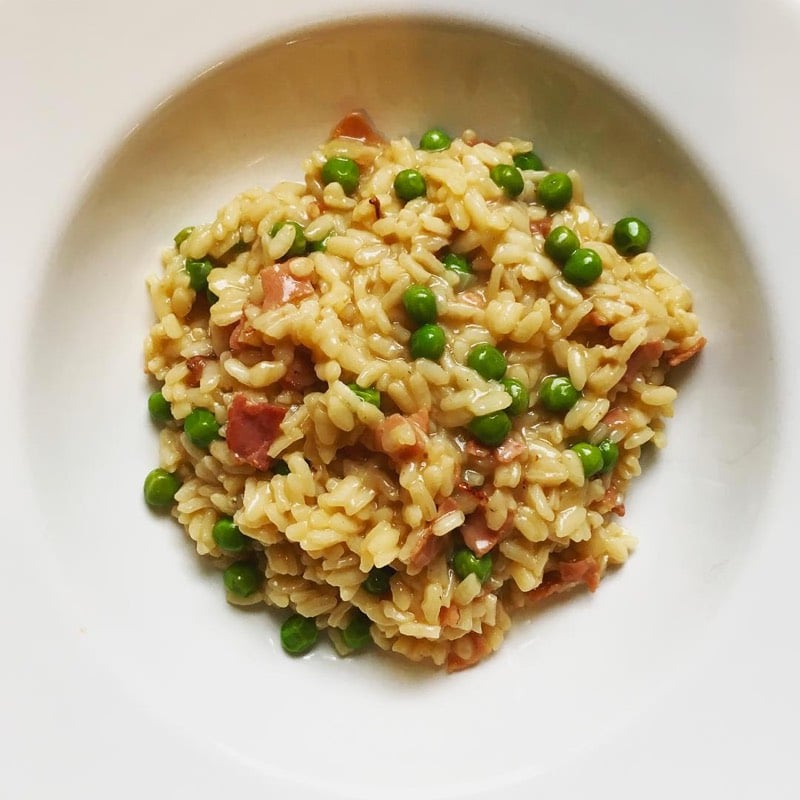
Ham and pea risotto: arborio rice, ham stock, parmesan. 6 minutes in the pressure cooker!
(Of course, as with all recipes, this refers to the length of the longest step, really. You still have to chop the onions, fry them with the rice, get the whole thing up to temp/pressure. But that would be the case with a traditional recipe, too, except you’d have to add at least half an hour of stirring!)
Mrgan uses The Instant Pot, which seems to be the internet’s choice for pressure cookers.
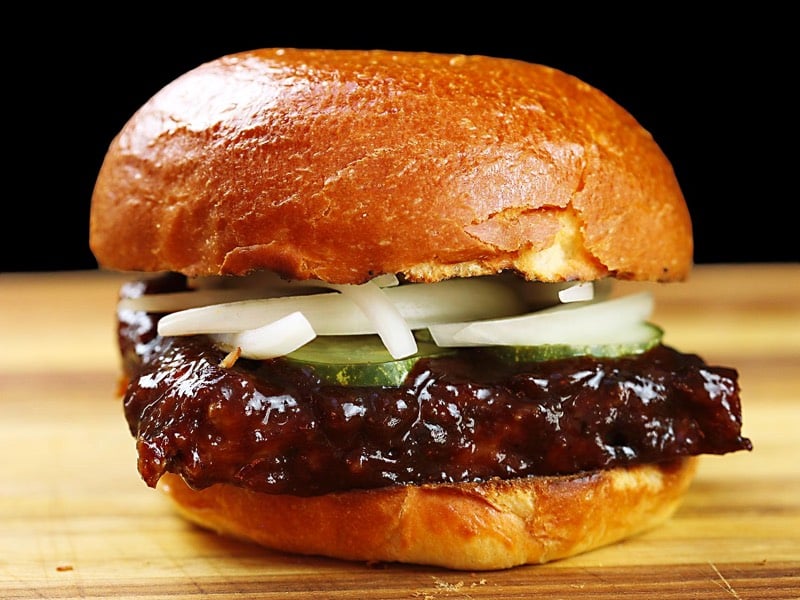
That, my friends, is a photo of Kenji López-Alt’s homemade McRib sandwich. The McDonald’s version is beloved but has been on and off the menu with maddening irregularity, so Kenji spent weeks/months creating a McRib recipe for the home cook.
The problem is that, while the McRib might be inspired by real barbecue, it’s ultimately a lie. Despite its corrugated appearance, it has little to do with actual ribs. (McDonald’s doesn’t even indicate that the product contains actual rib meat.) It’s not smoked, as one would expect of barbecue ribs. Indeed, it’s not even grilled — it’s cooked on a griddle. We can do better.
My goal? Take everything we love about the McRib sandwich and turn it up to 11, by starting from scratch with a few high-quality ingredients and a lot of good technique (including honest-to-goodness smoking). I wanted to maximize flavor and texture, unlocking the sandwich’s full potential and allowing it to evolve, Pokémon-style, into something so much better.
One of my favorite pieces of food writing from the past few years is Willy Staley’s piece on the economics of the McRib.
And for recipes for more of your favorite fast food at home, see the homemade Shack Burger, homemade McDonald’s fries, homemade Egg McMuffin, homemade Big Mac, and homemade Chick-Fil-A.
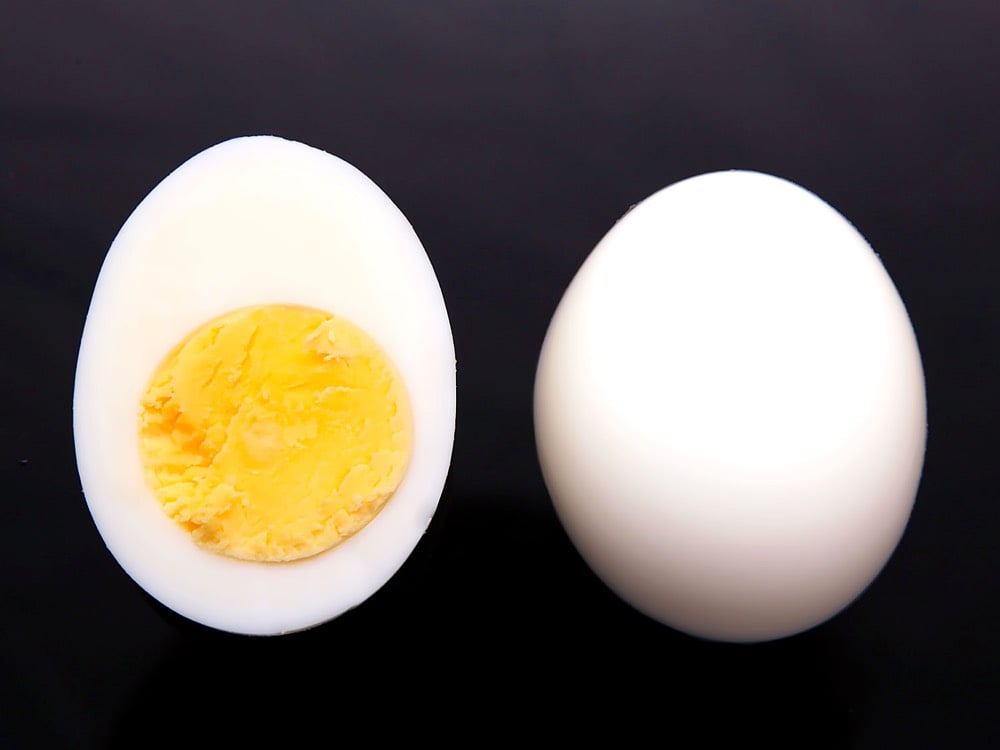
There are lots of ways to boil an egg. You can drop them in already boiling water. You can start them in cold water and bring to a boil. You can bake them in an oven at a low temperature. You can sous vide them for awhile. I’m sure you have your technique.
The easiest, fastest, and tastiest way I’ve found to make perfect hard boiled eggs is Kenji López-Alt’s Perfect Steamed Boiled Eggs Recipe. That’s right, you steam the eggs.
Fill a large pot with 1 inch of water. Place steamer insert inside, cover, and bring to a boil over high heat. Add eggs to steamer basket, cover, and continue cooking 6 minutes for soft boiled or 12 minute for hard.
Since that little bit of water boils much quicker than a full pot, you’re done much quicker. And peeling is easy too; I don’t even wait the 15 minutes or do it under running water, those shells come off super easy.
P.S. I’ve been cooking more recently, and I’m almost exclusively using recipes and techniques from Serious Eats and The Food Lab. (For instance, I made this Spanish tortilla a couple of weeks ago and it was amazing.) I’m sure I’ll branch out soon, but for now, *kisses fingers*.
One of the things that a number of people commented on after seeing The Force Awakens (including me) was that the movie seemed to be a remix or an homage to the original Star Wars.
With The Force Awakens, JJ Abrams did the same thing, but instead of pulling from Flash Gordon and Kurosawa like Lucas did, he pulled from what he grew up with as a kid and in film school…Star Wars and Spielberg. In a way, The Force Awakens is a reboot of the original 1977 Star Wars, similar plot and all. And even if it isn’t a true reboot, it sure does rhyme.
Although some of the comparisons are a stretch, this video does a nice job highlighting the visual similarities of the two movies.
Related: Kenji Lopez-Alt took off his food nerd hat for a second and donned his Star Wars nerd hat with this piece at Medium: Rey is a Palpatine.
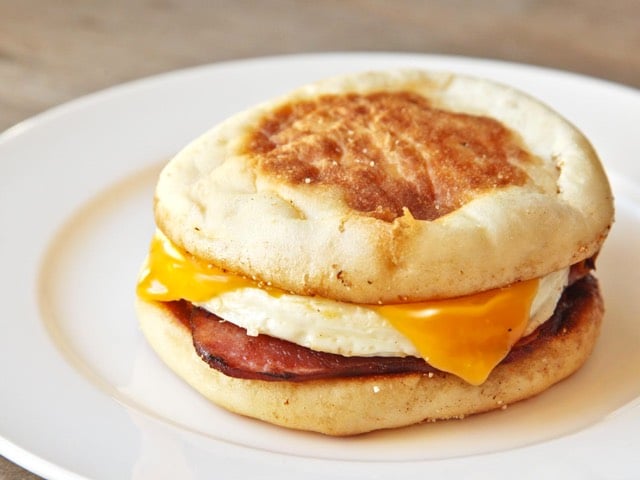
At Serious Eats, the Food Lab’s Kenji Lopez-Alt reverse engineers (and improves) the Egg McMuffin for the home cook. Clever use of a Mason jar lid for cooking the egg.
Kenji Lopez-Alt, whose work you and I have followed at Serious Eats for several years now, has come out with a cookbook called The Food Lab: Better Home Cooking Through Science.
Ever wondered how to pan-fry a steak with a charred crust and an interior that’s perfectly medium-rare from edge to edge when you cut into it? How to make homemade mac ‘n’ cheese that is as satisfyingly gooey and velvety-smooth as the blue box stuff, but far tastier? How to roast a succulent, moist turkey (forget about brining!) — and use a foolproof method that works every time?
Instant purchase for me. You take a peek inside the book at Kenji’s site.
Being an avid eater and cooker of steak,1 a passage at the end of Tom Junod’s profile of Wylie Dufresne / obit of WD-50 caught my eye:
“That’s why I’m really proud of what we did here,” he said over his cup of sake. “I’m proud of the big things, but I’m also proud of the little things we routinely did well. Do you know what made me most proud in the meal I served you? The Wagyu beef. It was perfectly cooked.”
“The advantage of sous vide,” someone said.
“But it wasn’t sous vide!” Dufresne said. “That’s the thing. It was cooked in a pan. And it had no gray on it! Do you know how hard that is? Do you know how much work that takes? Turning the beef every seven or eight seconds … And so that question you asked me before, about food and music — that’s my answer: a perfect piece of Wagyu beef cooked in a pan that comes out without any gray on it. It might not be ‘When the Levee Breaks,’ but it’s definitely ‘Achilles Last Stand.’”
I couldn’t recall hearing about this fast flipping technique from the many pieces Kenji Lopez-Alt has published about how to and how not to cook steak, so I pinged him on Twitter. He responded with Flip Your Steaks Multiple Times For Better Results.
Let’s start with the premise. Anybody who’s ever grilled in their backyard with an overbearing uncle can tell you that if there’s one rule about steaks that gets bandied about more than others, it’s to not play with your meat once it’s placed on the grill. That is, once steak hits heat, you should at most flip it just once, perhaps rotating it 90 degrees on each side in order to get yourself some nice cross-hatched grill marks.
The idea sort of makes sense at first glance: flipping it only once will give your steak plenty of chance to brown and char properly on each side. But the reality is that flipping a steak repeatedly during cooking — as often as every 30 seconds or so — will produce a crust that is just as good (provided you start with meat with a good, dry surface, as you always should), give you a more evenly cooked interior, and cook in about 30% less time to boot!
It works for burgers too. Thanks, Kenji!
At Serious Eats, Kenji López-Alt sets the record straight about some misconceptions people have about cast iron pans.
The Theory: Seasoning is a thin layer of oil that coats the inside of your skillet. Soap is designed to remove oil, therefore soap will damage your seasoning.
The Reality: Seasoning is actually not a thin layer of oil, it’s a thin layer of polymerized oil, a key distinction. In a properly seasoned cast iron pan, one that has been rubbed with oil and heated repeatedly, the oil has already broken down into a plastic-like substance that has bonded to the surface of the metal. This is what gives well-seasoned cast iron its non-stick properties, and as the material is no longer actually an oil, the surfactants in dish soap should not affect it. Go ahead and soap it up and scrub it out.
I have two cast iron pans, including this skillet I use almost exclusively for making the world’s best pancakes. Although, after hearing from Kenji that vintage cast iron pans can be slight better than modern pans, I might seek a replacement on Etsy. See also how to season a cast iron pan.
Kenji Lopez-Alt and the folks at the Harlem Shake restaurant have invented a burger that’s all delicious brown crust.
See, by placing a ball of meat on a hot, un-oiled griddle and smashing it down firmly into a flat, thin disk, you greatly increase the contact points between the meat and the griddle, which in turn increases the Maillard reaction. That’s the series of chemical reactions that creates the rich brown crust that makes our steaks and burgers taste so freaking good. Maximum crust = maximum flavor = maximum craving.
I’ve already discussed the basic ins and outs of smashed burgers in the past, but after writing that article, I found myself wondering, what if I were to take this to the extreme? Is there a way I can pack even more flavor into a burger?
Spoiler alert: the answer is a big fat (or should I say short smashed?) yes.
At Serious Eats, Kenji Lopez-Alt turned 32 pounds of flour and other ingredients into more than 1500 cookies and in the process discovered how to make the perfect chocolate chip cookie.
You see, I’ve never been able to get a chocolate chip cookie exactly the way I like. I’m talking chocolate cookies that are barely crisp around the edges with a buttery, toffee-like crunch that transitions into a chewy, moist center that bends like caramel, rich with butter and big pockets of melted chocolate. Cookies with crackly, craggy tops and the complex aroma of butterscotch. And of course, that elusive perfect balance between sweet and salty.
Some have come close, but none have quite hit the mark. And the bigger problem? I was never sure what to change in order to get what I want. Cookies are fickle and the advice out there is conflicting. Does more sugar make for crisper cookies? What about brown versus white? Does it matter how I incorporate the chocolate chips or whether the flour is blended in or folded? How about the butter: cold, warm, or melted?
So many questions to ask and answers to explore! I made it my goal to test each and every element from ingredients to cooking process, leaving no chocolate chip unturned in my quest for the best. 32 pounds of flour, over 100 individual tests, and 1,536 cookies later, I had my answers.
Dang, this is like The Power Broker for baked goods, a cookie magnum opus.
Update: Back in 2007, my wife took a different approach to making the perfect chocolate chip cookie: she averaged the ingredients from 12 of the best cookie recipes she could find. The averaged recipe reads, in part:
2.04 cups all-purpose flour
0.79 tsp. salt
0.79 tsp. baking soda
0.805 stick unsalted butter, softened to room temperature
0.2737 stick unsalted butter, cold
0.5313 stick unsalted butter, melted
For the Food Lab, Kenji Lopez-Alt debunks some old wives’ tales related to cooking steak.
Myth #2: “Sear your meat over high heat to lock in juices.”
The Theory: Searing the surface of a cut piece of meat will precipitate the formation of an impenetrable barrier, allowing your meat to retain more juices as it cooks.
The Reality: Searing produces no such barrier-liquid can still pass freely in and out of the surface of a seared steak. To prove this, I cooked two steaks to the exact same internal temperature (130^0F). One steak I seared first over hot coals and finished over the cooler side of the grill. The second steak I started on the cooler side, let it come to about ten degrees below its final target temperature, then finished it by giving it a sear over the hot side of a grill. If there is any truth to the searing story, then the steak that was seared first should retain more moisture.
What I found is actually the exact opposite: the steak that is cooked gently first and finished with a sear will not only develop a deeper, darker crust (due to slightly drier outer layers-see Myth #1), but it also cooks more evenly from center to edge, thus limiting the amount of overcooked meat and producing a finished product that is juicier and more flavorful.
If you’re serious about home-cooked steak, the “Further Reading” section at the bottom of this piece is your new best friend.
But it’s more than a cookbook…here’s the description from Facebook (the “me” is Kenji Lopez-Alt, SE’s resident mad scientist):
It’s coming out November, has 50 recipes from me, and whole bunch of awesome recommendations for the best food around the country.
The title is Serious Eats: A Comprehensive Guide to Making and Eating Delicious Food Wherever You Are and it’s available for preorder on Amazon.
Kenji from Serious Eats went to In-N-Out, found a willing employee accomplice (“Awesome! I’ve been waiting for this day ever since I started working here!”), and proceeded to order one of everything off of the menu, the well-known secret menu, and the not-so-well-known super secret menu.
That should make you feel better about yourself when you tuck into the meat and cheese fest known as the Flying Dutchman — the ultimate Atkins-friendly menu item. Two slices of cheese melted between two burger patties. No rabbit food, no wimpy buns, just pure protein and fat. Want to kick up the manliness by yet another factor? Ask for a Flying Dutchman Animal Style and they’ll add a scoop of diced onions to the cheese. Pickles and spread will come on the side, so you’ll have to add them yourself. “I wish we could add the spread and pickles for you, but it’s just too messy for the cooks,” explained an apologetic Thomas. The result definitely wins the award for messiest menu item of all time.
Over at Serious Eats, Kenji Lopez-Alt shows how you can cut your onion caramelization time from 45 minutes to about 15 or 20 minutes.
Before we can figure out how to improve our end results, it’s important to understand exactly what’s going on when an onion browns. First, the onions begin by sweating. As they slowly heat up, moisture from their interior (they are roughly 75% water by weight) begins to evaporate, forcing its way out of the onion’s cells, and causing them to rupture in the process. This breakdown of the cells is what causes onions to soften during the initial stages of cooking.
Over at Serious Eats, Kenji Lopez-Alt has a long piece about a visit he took to a foie gras producer in New York’s Hudson Valley and what he learned about the ethics of foie gras production.
Even if you haven’t eaten foie, pretty much everyone is familiar with the abhorrent images of mistreated ducks peddled by PETA and sites like nofoiegras.org, and indeed they are truly disturbing. Ducks crammed into wire cages just big enough to stand in with their filth-encrusted heads sticking out a hole in the front. Their feathers are scraggly and wiry (if present at all), there’s often blood coming out of their nostrils, and their faces and feathers are caked with vomit and corn meal. A duck drinks scummy water out of a communal trough running in front of it while just upstream one of its less fortuitous bunkmates sits dead with its head lolling sideways, half submerged in the cloudy green water.
I’ve no doubt that farms like this exist in the world, and it is a terrible, atrocious tragedy. If this is how all foie-or even all meat-is produced, I’d become a vegetarian today. But video or photographic footage of one badly managed farm or even a thousand badly managed farms does not prove that the production of foie gras, as a practice, is necessarily harmful to the health or mental well-being of a duck. Foie gras production should be judged not by the worst farms, but by the best, because those are the ones that I’m going to choose to buy my foie from if at all.
So the real question is: is the production of foie gras torturous under even the best of conditions?
Those on one side would answer yes. How could force feeding an animal ever be considered anything but torture? On the other hand are those who claim that American foie farms are positively idyllic with ducks waddling around spacious pens, even queuing up for their gavage, that for a duck, none of the things we consider uncomfortable stress them out in the least. But who’s right?
Kenji Lopez-Alt learns the secret to the perfectly poached eggs at Maialino. They basically use the Momofuku slow-poach technique and then finish in a simmering water bath.
Kenji Lopez-Alt busts six stubborn food myths.
4. Searing “Locks In” Juices. This is the oldest one in the book, and still gets repeated-by many highly respected cookbook authors and chefs!-to this day. It’s been conclusively proven false many times, including in our own post on How to Cook a Perfect Prime Rib, where we found that when roasting a standing roast, it in fact lost 1.68% more juice if it was seared before roasting rather than after! The same is true for pork roasts, steaks, hamburgers, chicken cutlets, you name it.
Over at Serious Eats, Kenji Lopez-Alt assures us that while you can’t make restaurant-quality Neapolitan pizza at home, you can come damn close. Best thing is, his technique doesn’t involve lining your oven with bricks and is actually as easy as making regular pizza at home.
After cooking for around a minute and a half, the bottom crust achieved the perfect degree of char-even better than what I was getting on the stone. Interestingly enough, the pan was actually cooler than the stone I was using, maxing out at around 450 degrees. So how does a 450 degree pan brown better and faster than a 550 degree stone? It’s a matter of heat capacity and density.
The heat capacity of a material is directly related to the amount of energy that a given mass of material holds at a given temperature. Even though stone has almost twice the heat capacity than steel (.2 kcal/kg C vs. .1 kcal/kg C), it loses in two ways: it is far less dense than steel, and it has a much lower rate of heat conduction than steel. The pizza cooking in a skillet is not just getting energy from the pan-it’s getting energy from the burner below the pan as it gets rapidly conducted through the metal.
It’s a clear demonstration of how when cooking foods, what matters it the amount of energy transferred, not just the temperature you cook at. The two are often directly related, but not always.
I have said it before but will repeat: I love Kenji’s nerdiness about the science combined with the ability to come up with the solution that’s easiest for non-nerds to appreciate and implement. It is a rare and wonderful thing to observe.
Today in the excellent Food Lab series, Kenji Lopez-Alt reverse engineers the In-N-Out burger.
According to the In-N-Out nutrition guideline, replacing the Spread with ketchup results in a decrease of 80 calories per sandwich. I know that ketchup has about 15 calories per tablespoon, so If we estimate that an average sandwich has about 2 tablespoons of sauce on it (that’s the amount that’s inside a single packet), then we can calculate that the Spread has got about 55 calories per tablespoon (110 calories in two tablespoons of Spread minus 30 calories in 2 tablespoons of ketchup = 80 calories difference in the sandwich). With me so far?
It just so happens that relish has about the same caloric density as ketchup (15 calories per tablespoon), and that mayonnaise has a caloric density of 80 calories per tablespoon. Using all of this information and a bit of 7th grade algebra, I was able to quickly calculate that the composition of the Spread is roughly 62 percent mayo, and 38 percent ketchup/relish blend.
Here’s the recipe to make your own at home. Pairs well with make-at-home McDonald’s french fries. See also make-at-home Shake Shack burger.
It involves finagling some uncooked frozen fries from a local McDonald’s under the ruse of a scavenger hunt. Kenji Lopez-Alt explains.
I’ve been literally giddy with the quality of the fries that have been coming out of my kitchen for the last two days. My wife won’t hear the end of it. Even my puppy is wondering why his owner keeps exclaiming “Holy s**t that’s good!” every half hour from the kitchen. I’ve cooked over 43 batches of fries in the last three days, and I’m happy to report that I’ve finally found a way to consistently reach crisp, golden Nirvana.
Here’s the full recipe/instructions. BTW, Kenji’s series of posts on Serious Eats is one of the best things going on the web right now (you might remember his sous-vide in a beer cooler hack). Passionate down-to-earth writing about cooking and food backed by some serious skills and scientific knowledge…it’s really fun to read.


Stay Connected